Connecting to Group Web Accounts Using DreamWeaver CS1 – CS4
Note: If you are using Dreamweaver CS3, you must contact IT Services and request that your account be configured for WebDAV use with Dreamweaver CS3.
Open the DreamWeaver Application.
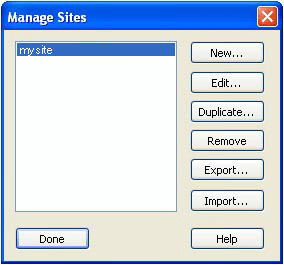
1. From the Site menu in Dreamweaver, choose Manage Sites.

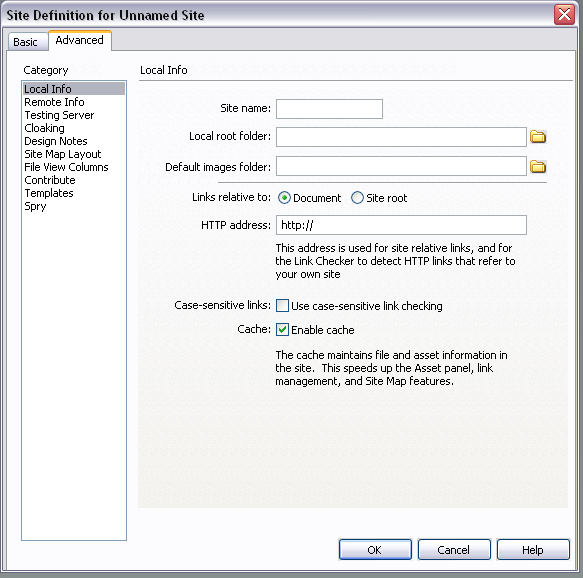
2. Click and New button and click on the Advanced tab.
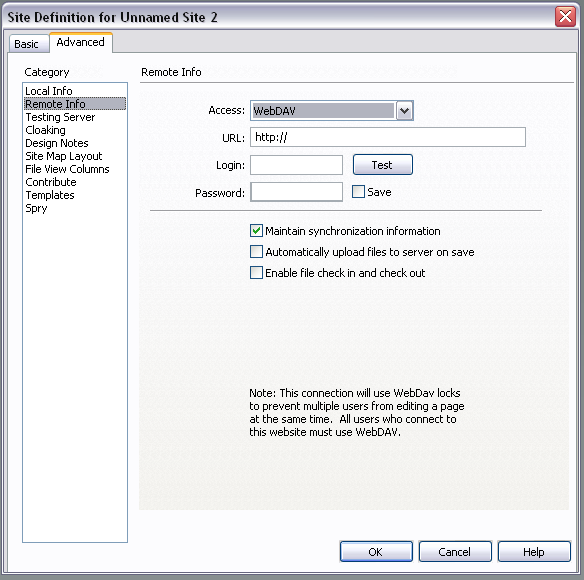
3. Fill in the appropriate fields. Site Name is the name DreamWeaver calls your site. Local Root Folder is the folder on your computer that stores files that will be on the site. The rest of the fields should be straightforward.4. Select Remote Info in the left side menu and choose WebDAV from the drop down menu as shown.
5. Enter in the URL field.
Note: If you are using DreamWeaver CS3, you should have contacted ITS to configure your group account for Dreamweaver CS3. They will respond with a URL most likely different than the URL of your group account website. (eg. – webdav.truman.edu/awesome_city_hotdog_vendors)
6. Enter your Truman username for Username and enter your password in the Password blank.
7. Click Test to make sure DreamWeaver can connect to your website.
 To connect to your website and edit files:
In the side bar, click Files to expand the files dialog.
Select your site from the drop down menu, then select Remote View.
Now push the Connect button underneath your site name. The button is unlabeled.
After connecting, DreamWeaver will show all the files in your group account website, which you can open, edit or delete.
If you wish to edit a file, right click on the file and select Get. A dialog will most likely appear, asking whether to import dependent files. This is referring to images, scripts, CSS documents, and other files the page you are editing will need to be viewed properly on your local computer.
“Getting” a file will copy the file to your local root folder, as well as dependent files if you selected to import them in the popup dialog mentioned above.
Once you have finished editing the file, select Local View in the File sidebar dialog, right click the file, and select Put. This will upload the file to the Truman web server.

