Network Drive Connection: Windows 11
Windows 10 and older version of windows are no longer supported by ITS.
Below are the instructions to connect to Truman’s network drivers, including the Y: drive for student files. Follow these steps once you are connected to the Truman network on campus, or using the View Client. In order to connect from off-campus, you must first connect with the Truman VPN service.
Firstly click on the windows icon on your taskbar and type ‘File Explorer’ in the search bar.
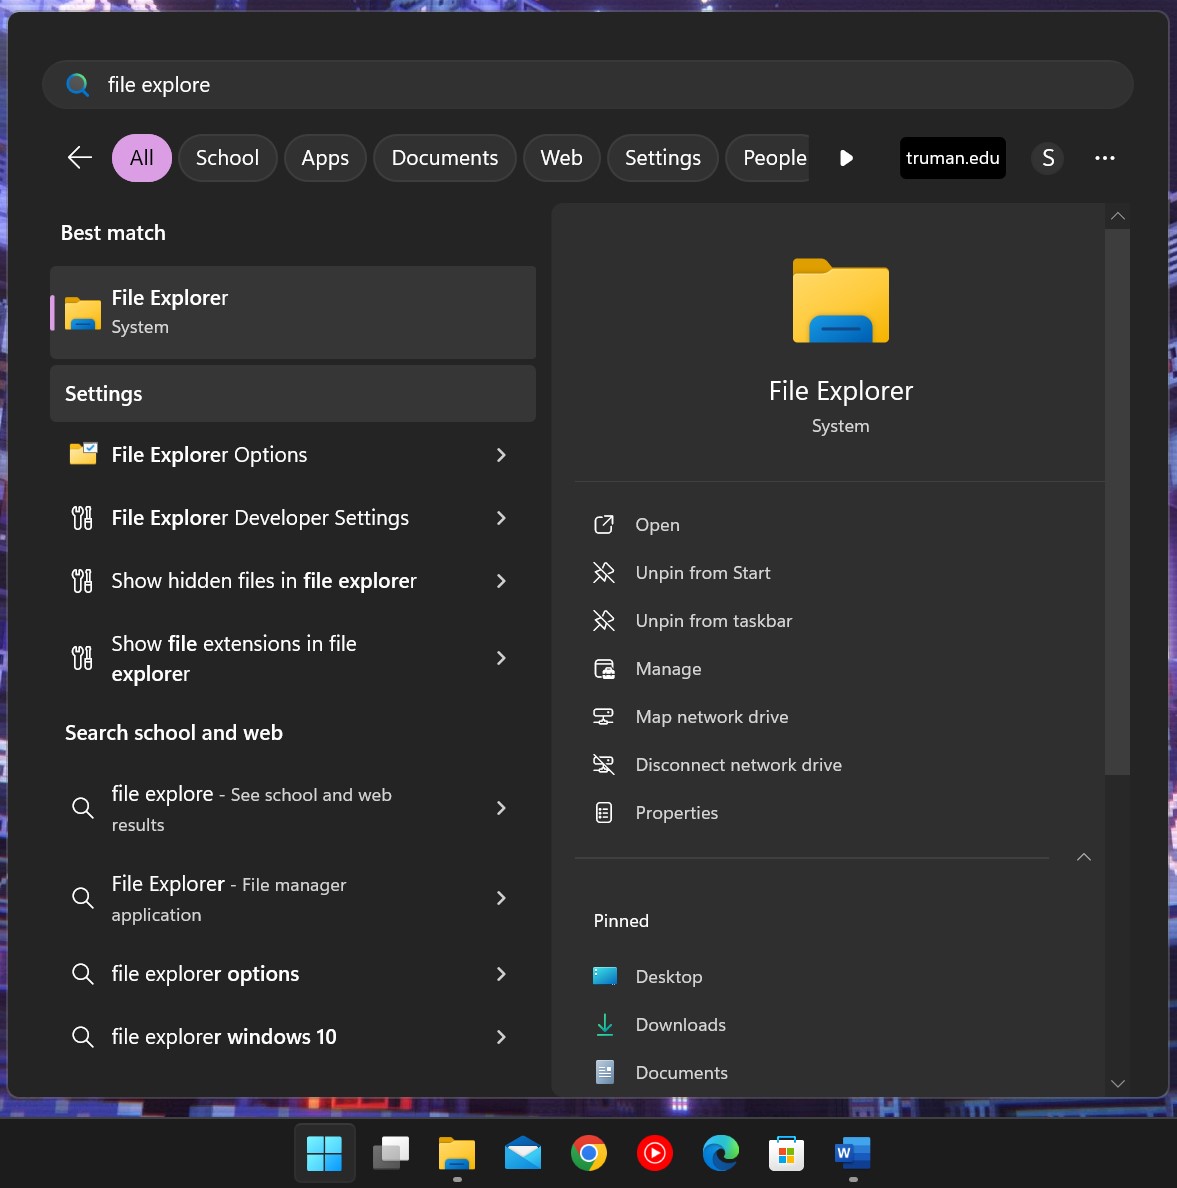
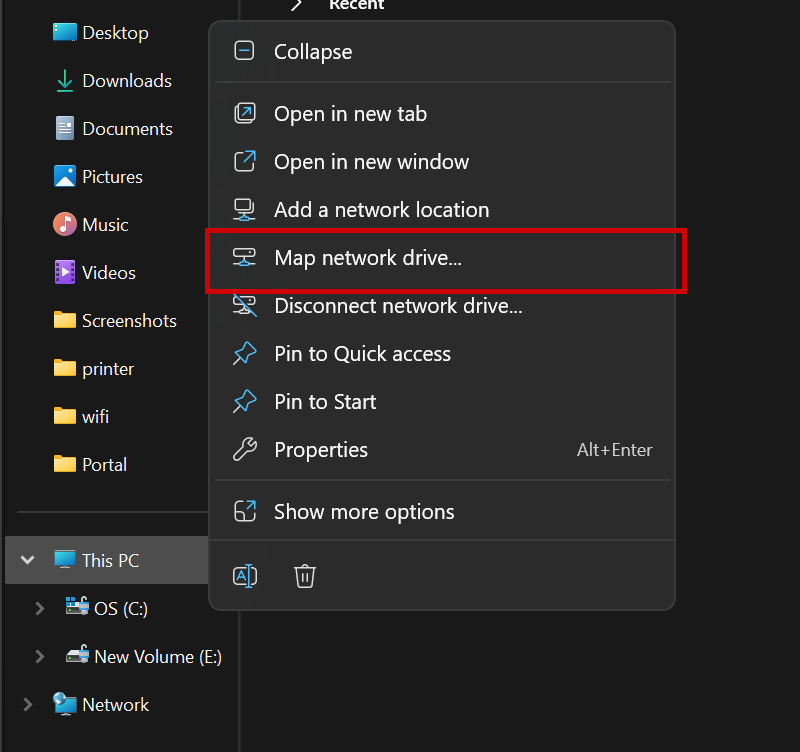
Then click on the File Explorer app that shows up on your search results. This will open up the File Explorer. On the side panel, right click on ‘My PC’. This will open up a menu as shown below. Click on ‘Map network drive’
This will open up a Map network drive window. Assign a drive letter as per your preference. Then on the folder field type in the address for the network drive. The general format for the drive address is \\servername\share(optional).
- Example: For student drive: \\hydrogen\abc12321
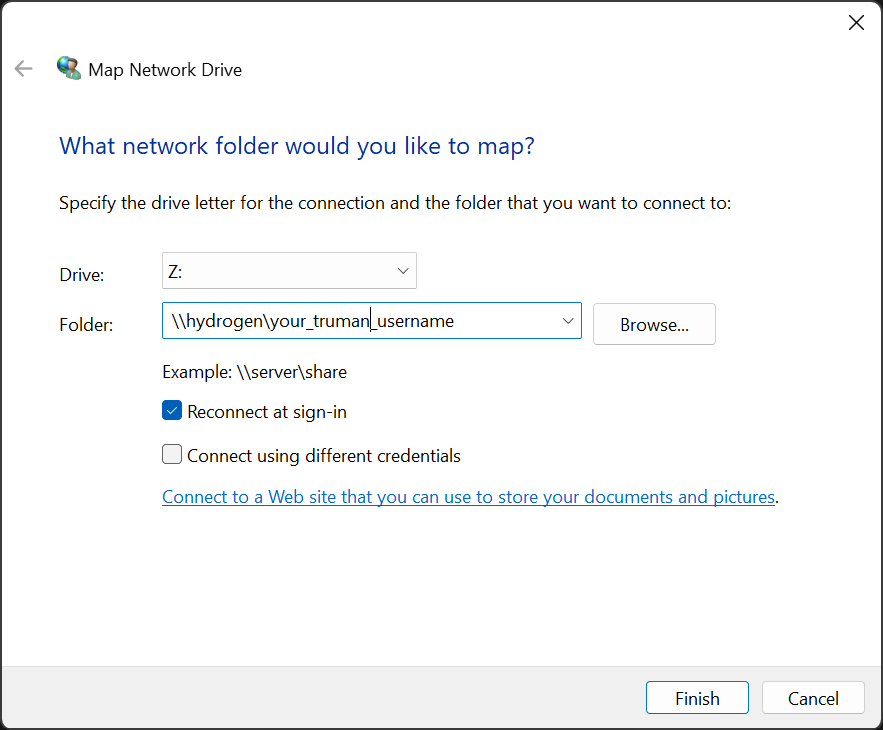
After that press finish button. A popup window will appear, prompting you for your Truman credentials. In the username field, enter: truman\your_truman_username (e.g., truman\abc123). Next, enter your Truman password in the password field. Be sure to check “Remember my credentials” to ensure automatic connection to the printer during login. Finally, click Connect.
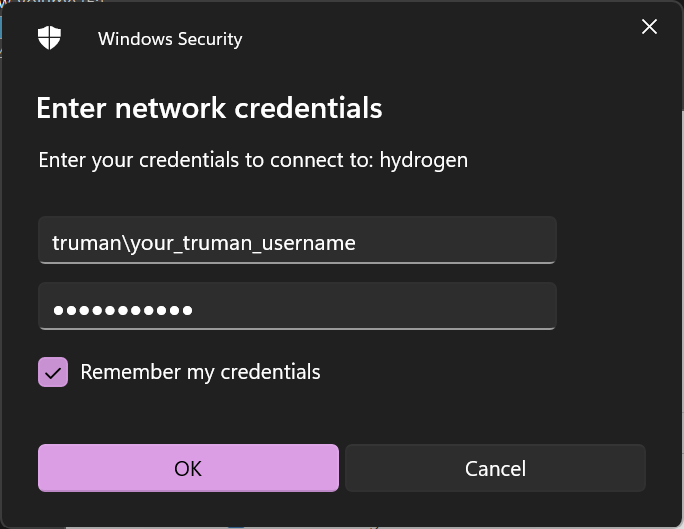
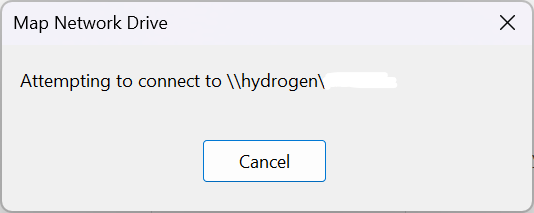
Your computer will then attempt to connect to the Truman network drive. You will see a window similar to the one shown in the screenshot below:
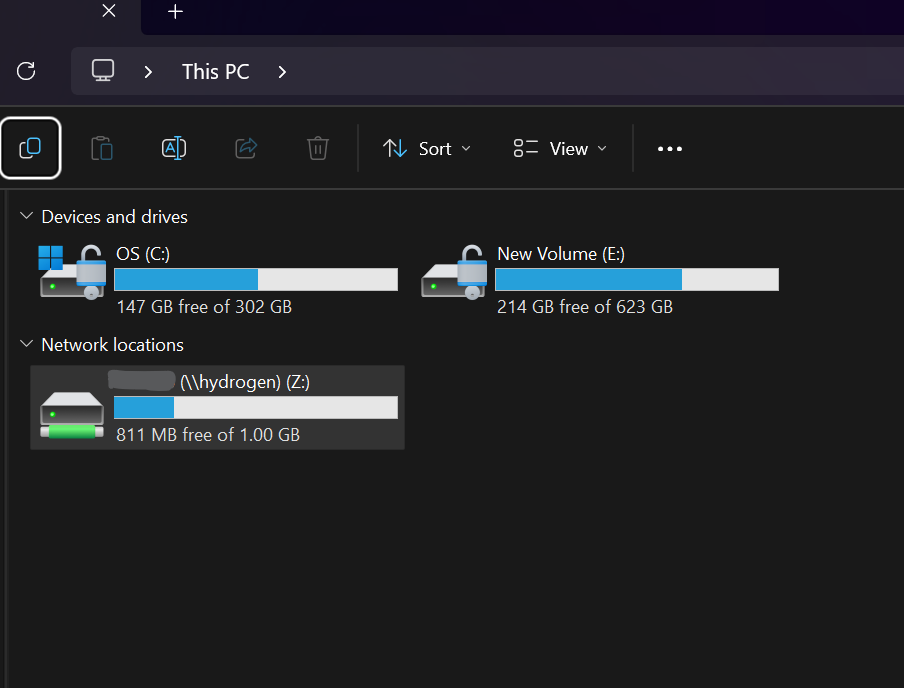
Once the connection is successful, your network drive should appear in the list of available drives.
The available servers:
| Drive | Server | Share |
|---|---|---|
| S: | ss1 | win_apps |
| T: | xenon | username |
| U: | hydrogen | Student_files |
| Y: | hydrogen.truman.edu | username |