Connecting to Group Web Accounts using DreamWeaver 4
Macromedia DreamWeaver is a full-featured web editor, useful for advanced web designers. DreamWeaver 4 supports webDAV connections, however it requires the 4.01 patch in order to work correctly. This patch can be downloaded and installed for free from the Macromedia Website. ITS-Web Services has not tested with more recent versions of DreamWeaver.
http://www.macromedia.com/support/dreamweaver/downloads/dw4_updater.html
Additionally, in order for DreamWeaver to connect to a group account, a number of server settings must be changed (the default set-up is for users of FrontPage). If you plan to use DreamWeaver, please contact the IT Services Help Desk at x4544, and tell them that you need your website configured so that you may use DreamWeaver. After this is completed by the Web Integration team, you will be able to connect to your site using the patched version of DreamWeaver.
Open the DreamWeaver Application.
Go to the Site menu and select Define Sites. The Define Sites window will open.
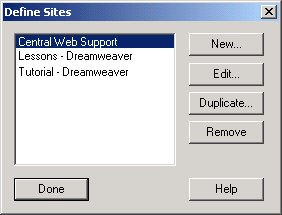
Click on New to create a new site. A new dialog box appears:
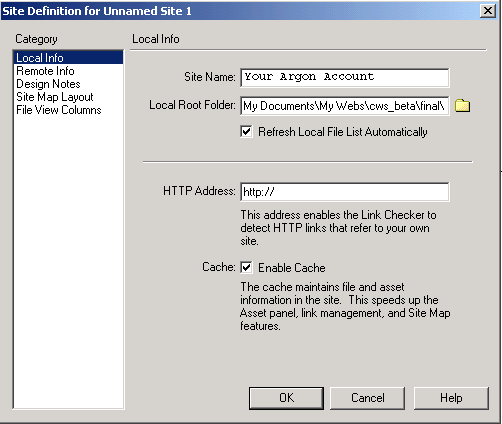
Enter the name of your site at the Site Name prompt. This is a name that will be used as a reference to you, the web developer. It will not effect the content of your web site.
At the Local Root Folder prompt, click on the mini folder icon to browse. In this example, we will browse to the "Desktop". Once again, this setting will not affect the content of your web site. The only restriction is that you use a location on your hard drive that is convenient for you.
Once your desktop is selected, click on the New folder icon to create a new local root folder for your site.
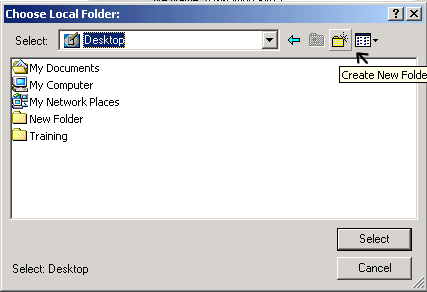
Name your new folder to reflect the name of your site. For example, if you are maintaining the IT Services Web, you would name the folder "IT Services Web" With your new folder selected, click on Open
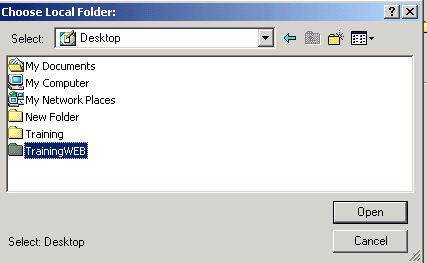
It opens your folder. Now click on Select. Now from the left click Remote Info;
Then on the right use the pull down menu and select WebDAV;
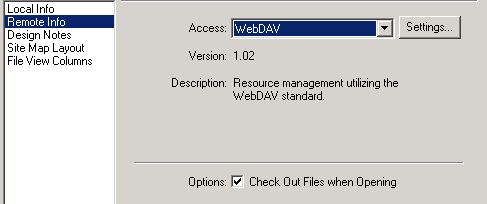
Uncheck the box Options: Check Out Files when Opening
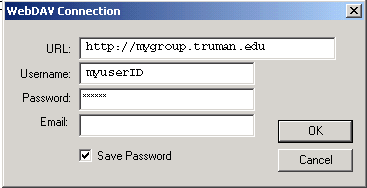
Click on the Settings Button. A new box appears, and you will fill out your complete URL, username, password, and click OK;
The URL, username, and password should have been sent you after the creation of your web space. If you did not receive, or have lost this information, please contact the IT Services Help Desk at x4544.
Once you have configured the settings for WebDAV, you may return to the Site Map, and click on the Connect icon in the tool bar, or select Connect from the Site menu.
After connecting, DreamWeaver will open its interface, showing all the files in the web, which you can open, edit or delete. Files can be created or pasted into the web.
If you have any questions or problems, please contact the IT Services Help Desk at x4544.