Connecting to Group Web Accounts using Adobe GoLive
Adobe GoLive is a full-featured Web editor, useful for those who are comfortable with Adobe products. GoLive supports webDAV connections to accounts on Argon, allowing you to use it to connect to your web space from any location, on or off campus.
IMPORTANT, if you did not specify when you requested your account that you would be using Go-Live to connect to your account, please contact the IT Services IT Service Center at x4544, and tell them that you need your website configured so that you may use Go-Live. A number of server settings must be changed to support this application. (the default set-up is for users of FrontPage). After this is completed by the Web Integration team, you will be able to connect to your site using the instructions below.
Open the Adobe GoLive application
Go to the File Menu, choose Server, and then choose Connect to WebDav (or File Menu, and then choose WebDav Browser, depending on your version).
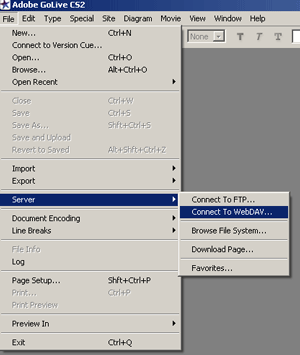
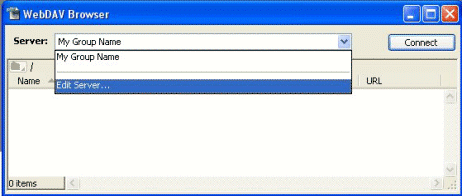
The will open up the WebDAV Window. Click on the Server drop-down box, and click on Edit Server.
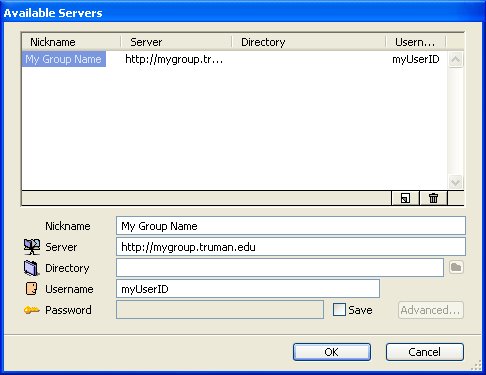
This will open the Available Servers Window. Here, you can specify the web space to connect to. The first time you enter the window, there will be no entries in the upper half, and the lower boxes will be grayed out. Click on the small icon that shows a page being turned (to the left of the trash can button). This button will create a new server connection. You can now fill in the boxes below. The nickname you choose will not affect the content of the web, and is there for your reference. In the server box, enter the full web address of your site (e.g. http://mygroup.truman.edu). The directory box can be left blank. The username box should receive the user name which was supplied to you by IT Services upon the creation of your web space. If connecting to your site from off-campus, you will need to enter truman/myUserID to make the connection. If you did not receive, or have forgotten, any of the required information, please contact the IT Services IT Service Center at x4544. After filling in the information, press OK.
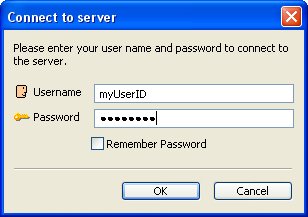
GoLive will then prompt you to supply your password to connect to the site. You should have received this password along with your user name. Enter it now, and press OK.
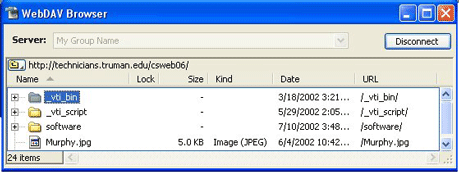
GoLive will now open your web space in the WebDAV Browser. From here, you can open files, delete them, create new files, or edit and save them live on the web. The server settings you created before will be saved by GoLive, so that you can connect to your site in the future by simply opening the WebDAV Browser, and hitting Connect.
If you have questions or problems, please contact the IT Services IT Service Center at x4544.