Windows 11: Connecting Wirelessly to the Truman Network
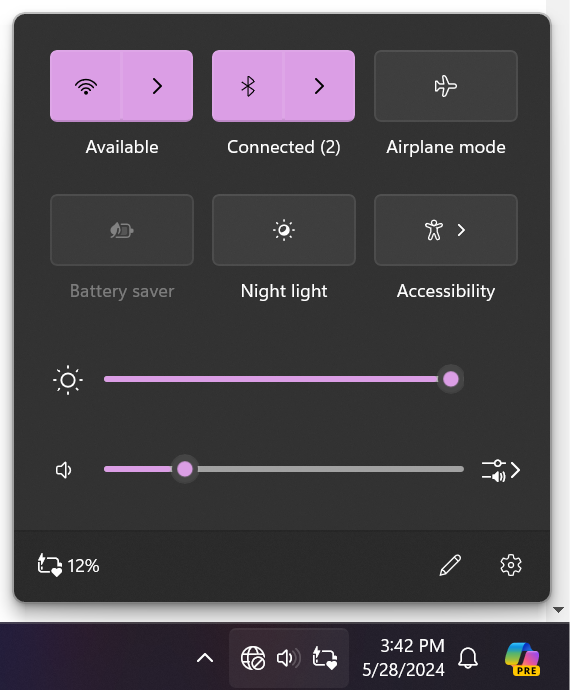
First, locate your Wireless icon. It should be near the date and time on your Taskbar, in the bottom right-hand corner. Click on it, and a menu that looks similar to the following screen should appear:
Quick Panel Menu
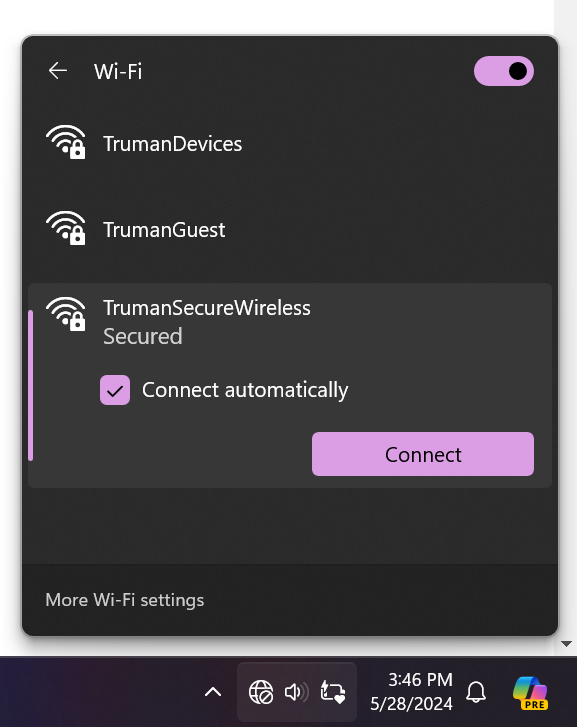
Then Click on the Wi-Fi Icon. This will open up the Wi-Fi Menu. Select Truman Secure Wireless from the menu. Be sure to click “Connect automatically”, then click “Connect”.
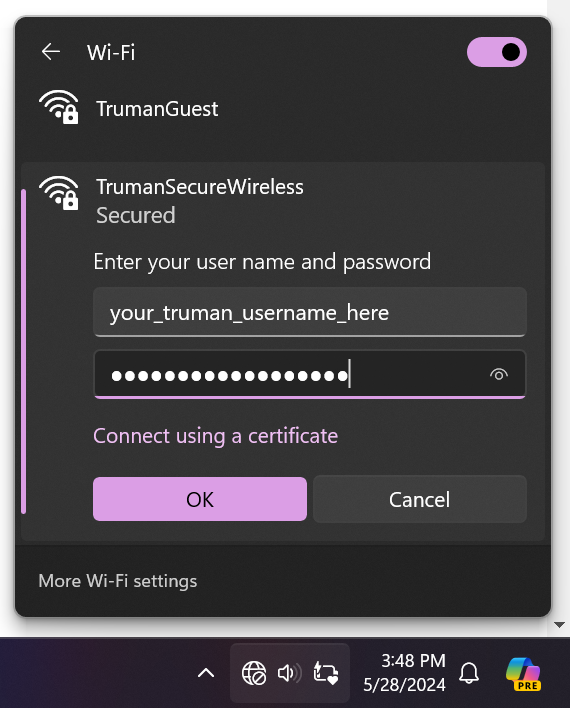
It will then prompt you to enter your Truman credentials. After entering the correct credentials, press Ok.
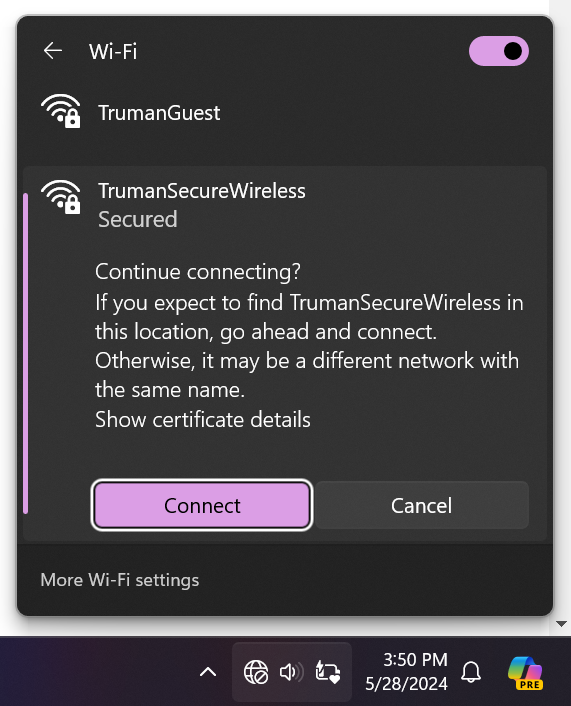
Once you press connect, it’ll ask you to confirm the connection.
Once done, you will be connected to the TrumanSecureWireless.